
It is easy enough to cut something straight in the workshop (or on site), with tablesaws, dropsaws (SCMS), and circular saws with guide rails. But what if you want to cut a circle, and either retain the resulting disc (such as for a cutting board, Lazy Susan, toy wheel etc), or the opening?
There are a lot of reality shows on these days, including those dealing with building renovations and makeovers. I have occasionally been known to watch them and am always bemused, and disappointed, that when it is time to cut a circle, they always rely on one of my least-favourite power tools to do the job – the jigsaw.
This is not to completely dismiss it as a tool – there are occasions when it is the best tool for the job. But not often in my opinion.
They vibrate, cut a messy line and generally tend to be inaccurate, even when a company shoves a laser on the front in a veiled attempt to convince the unwary buyer otherwise. Despite all this, and
the availability of other tools that can do a vastly better job, the jigsaw appears again and again.
So in spite of my opinions of the jigsaw, that is the first method I’ll use. There is very little to this method (one of the advantages), and it doesn’t rely on one of the workshop main machines, which is also an advantage when it comes to having to bring the tool to the work (and worksite).
Jigsaw
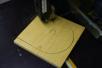
After drawing the circle of the required diameter, carefully cut to the line. The jigsaw is not a tool that can cope with creeping up on the mark – if you are trying to cut too close to the edge the jigsaw blade will flex and follow the path of least resistance rather than cut where desired. The method does cut something that resembles a circle, but if you were trying to make wheels for a child’s toy for example, it’d feel more like a flat-spotted tyre than a smooth ride.
Router
There are many other methods that are available, each capable of producing a circle vastly superior to that achievable with a jigsaw.
Sticking with handheld tools, the router, and the high-speed rotary (such as Dremel) are good at producing circles, particularly ones with a large diameter. By attaching an arm to the base of the tool, and securing the other end at the desired radius, it can be plunged in to complete the cut. Always be careful of the direction of cut – if you rotate the tool around the work in the same direction as the cutter is attempting to go, the tool can run away on you which can be very dangerous. The advantage of this method is a clean cut (compared to a jigsaw especially), an almost unlimited maximum diameter, and that the tool is brought to the work piece (and worksite).
When in my shed though, I approach circle cutting from a different direction – the router table, sanders (disk and spindle) and my personal favourite, the bandsaw.
Some have also used the tablesaw, but it is not a method I am willing to encourage – that is already a dangerous enough machine without using it to produce left-of-field results.

Bandsaw
Creating a circle-cutting jig for the bandsaw is both very easy, and rewarding. Unlike every other circle-cutting technique, the bandsaw can not only cut a circle out of flat stock, it can also cut tubes, cylinders and cones, up to the depth-of-cut of the bandsaw (often up to 12” in height).
A bandsaw circle-cutting jig starts with a flat board. Underneath, a mitre bar (either commercial or homemade) runs in the mitre slot of the bandsaw. A perpendicular stop is there to prevent the jig sliding too far past the centreline of the jig. On top you need a pivot point, in line with the front of the blade. It could be as simple as a nail hammered in then snipped off or, like I have for my circle jig, with rail, rule tape and a movable stop.
The pivot point is secured at the required radius of the final circle, and the workpiece is tapped onto the pivot point so it can be rotated freely. The cut starts with the jig clear of the blade. The work is held as the entire collection is slid into the bandsaw blade until the stop engages with the edge of the bandsaw table.
At this point, the work is rotated through the bandsaw blade, cutting a clean, accurate, repeatable circle.


Router Table
There is very little required to cut a circle using the router table – a board, a nail, a couple of clamps and a straight router bit.
After securing the router bit and lowering it below the table, a board is clamped to the top of the router table. The router bit is then raised through the board cutting a hole. At the required radius, a nail is hammered in, and then cut off near the board, creating a point.
The workpiece is tapped onto the pivot point, and then with the router switched on, the router bit is raised so it is cutting lightly into the underside. Rotate the board through a full 360º, creating a light track. To save the router bit having to work too hard, it is best to then use this track as a guide to roughly cut off the excess material, using a bandsaw, jigsaw or coping saw.
Return the workpiece to the router table, and complete cutting the circle. Take care to rotate the workpiece counter-clockwise, against the direction the router bit is rotating. If you go the other way (also known as a climb cut), there is a high likelihood that the bit will grab the workpiece and helicopter it across the workshop.

Sanders
Variations of this same technique can be used on various workshop sanders. By creating a pivot point, disk sanders, spindle sanders and even the drill press can be used to create a round disk. It is a rather dusty process through, so adequate dust collection and air filtration (and PPE) is a must.

At the end of the day, there are plenty of ways to cut a decent circle, without resorting to the reality TV staple of the (in)accurate jigsaw. Each method is very easy to execute – you actually have to be a bit careful as it becomes addictive, and you can end up with discs everywhere!
There is one common component to all these techniques – the pivot point at the centre of the circle. In some cases this doesn’t matter – it can be on the underside, or disguised. However, if it is going to be an issue, there are ways around that as well – be that using double sided tape to temporarily stick a thin piece to the centre, or hot glue, or even create a rotating vacuum system if you are into production runs of circles.
It is almost hard to imagine the jigsaw is a necessary tool at all…


