
Whether it is a simple keepsake box, a Krenov-inspired cabinet, an heirloom blanket box, or any personal project you are creating, there are subtle details you can include to take that project from ‘notable’ to ‘exceptional’.
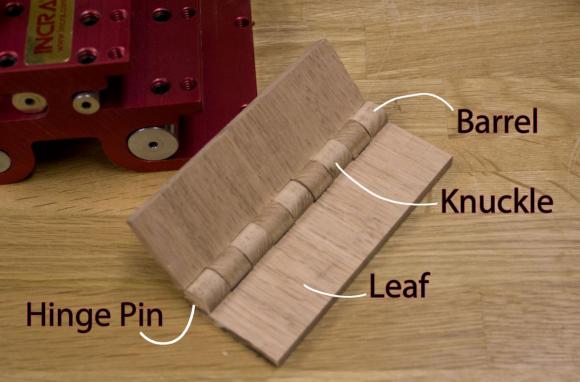
One of those details is the hinge. Too often, people choose just any old hinge (obviously with some degree of care), but if you really want to set the project apart, consider making your own. You have the choice of size, of the timber (or timbers) used, and instead of having to try to merge different materials (such as brass and wood, using screws and taking as much care as possible to avoid splitting the timbers) you can blend one into the other, or use a contrasting timber as a highlight.
Creating a wooden hinge is surprisingly easy. The following is just one technique, using quality router bits from Whiteside, paired up with the Incra Hingecrafter to accurately complete the process. But more on that later in the process.
Start by choosing the timber for the hinge and then sizing it to the thickness of the desired hinge knuckle. I used a drum sander for this step (revealing my predisposition towards large, electron-murdering machines!).
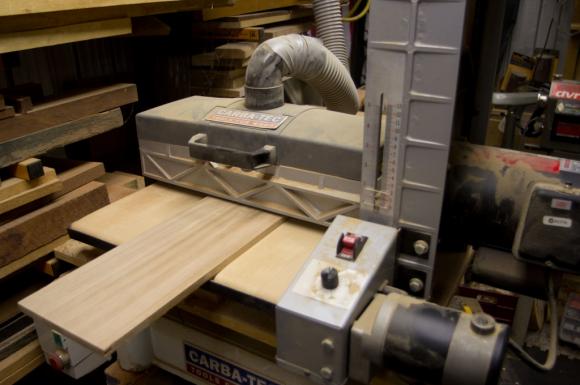
Careful use of a thicknesser can achieve a similar result, or if you are so inclined, a well-tuned handplane.
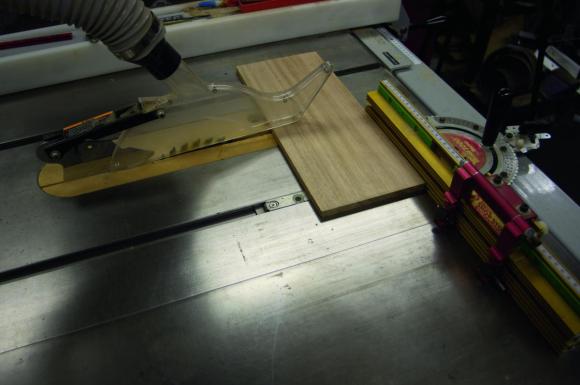
The resulting board (in this case 12.7mm thick) is then trimmed up on the tablesaw, creating an accurate rectangle of timber, approximately 250mm long, and wider than the final desired hinge length.
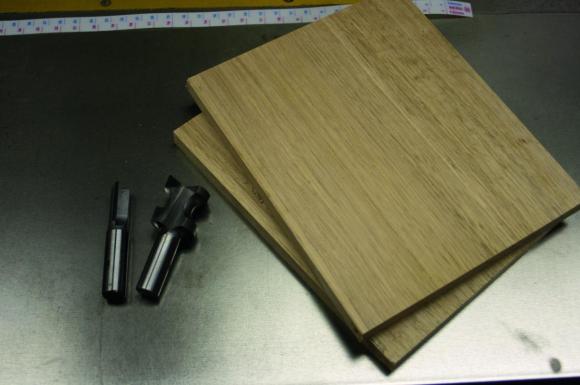
With two boards precisely machined, and matching router bits, it is time to form the knuckles. The router bits for the hinge consist of a bull-nose bit that rounds over the end, and a straight bit for cutting through the knuckles.
A router table is the only safe method to use these router bits in this operation. It means the work is controlled, and brought into contact with the router bit, rather than attempting to achieve this by hand-holding the router. Your router table can be as simple as a thick sheet of MDF, or as sophisticated as a full cast iron router table top with router lift. A fence of some form is also mandatory.
The first pass rounds the end of what will become the barrel of the hinge. Note the grain direction relative to the barrel – if it is not orientated this way, the resulting hinge would be extremely weak, and break easily.
The second pass completes the barrel, by holding the workpiece against the fence. For both these steps, some form of push block is important. A simple rule is to maintain a 6” gap (minimum) between your hands, and the part of any tool that is capable of eating timber with ease. It also ensures a more even pressure, and therefore a much better finish.
This operation is repeated at the other end of the block – it is easiest to form both sides of the hinge at the same time.
The other main component of a hinge is the leaf. With a straight cutter mounted in the router table, set to at least half the width of the barrel, the work is passed over the top, until the leaf is at least as wide as required.
If the leaf isn’t thin enough, the resulting hinge will not operate through the full range.
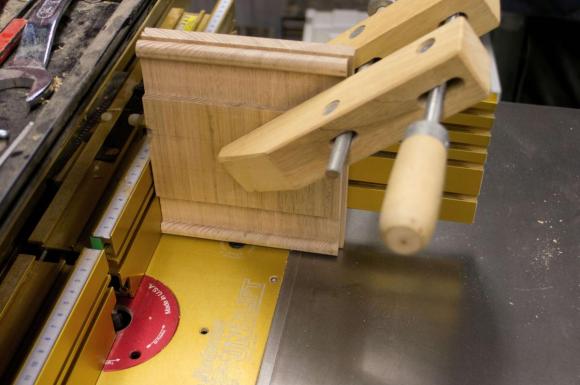
With the use of a right-angle sled (commercial, or shop-made jig), it is time to cut the barrel into the final knuckles. The handscrew clamp seems to have fallen out of favour over the years, replaced with all manner of modern designs, modern materials – but I still turn to it for many operations. It can be pre-set to a desired opening, and with a twist of the rear handle, it can be opened and closed quickly.
The jaws are parallel, providing significant contact area and, being wood, if it ever comes into contact with the cutter … well … it’s wood!
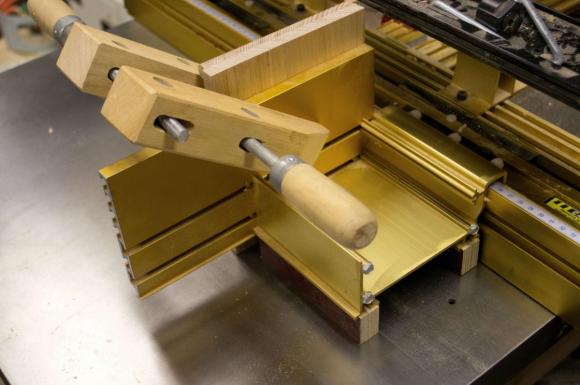
The right angle sled is best if it engages with the primary router fence, ensuring there is no chance the sled can slip sideways during a cut.
In this case, I have used the precision of the Incra LS positioner to position the sled for each cut, but there are other ways to achieve the same result. The Triton finger jointer (or a home-made equivalent) will also work well. The secret is to ensure precise, consistent indexing from one cut to the next. A backing board is also important to minimise the amount of tearout.
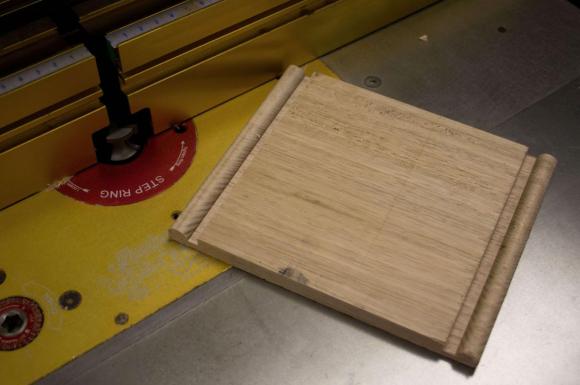
In this case I have made a traditional hinge, where the knuckles are the same size across the hinge width, but you can also skip knuckles as well for an interesting effect. (Remember however, that if you skip knuckles, it will make drilling a hole evenly through the knuckles more difficult, as it will not fit the Hingecrafter).
You are also not restricted to a simple hinge design either: you can also have multiple intermediate sections that allow the hinge to work around corners, or create other leaf shapes that fit in with your project design.
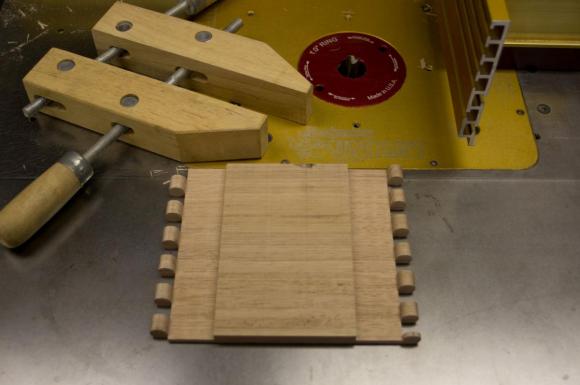
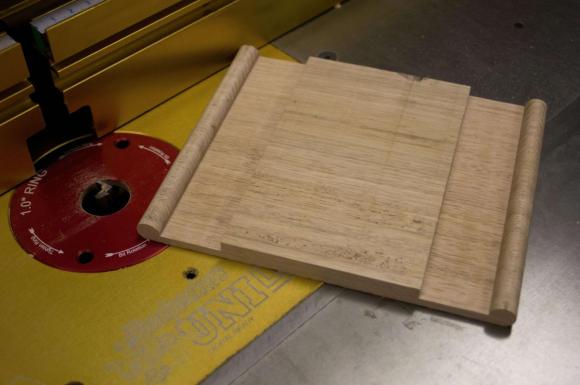
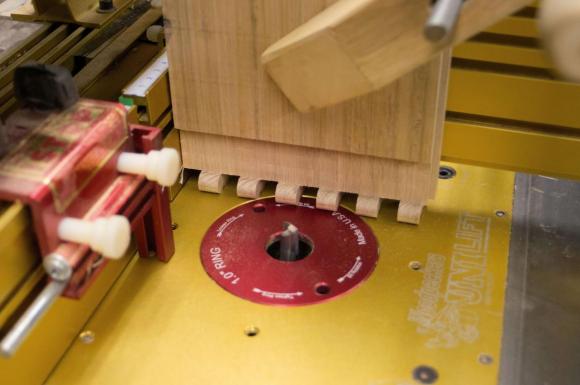
Once all the machining on the router table is complete, you will be left with both sides of the hinge attached to the board, with the desired leaf width cut, ready for the hinge sides to be separated once the holes are drilled for the hinge pin.
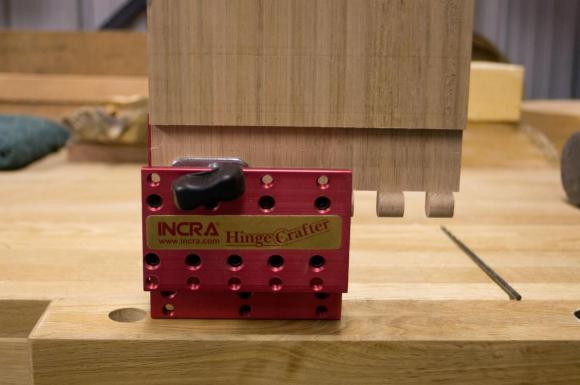
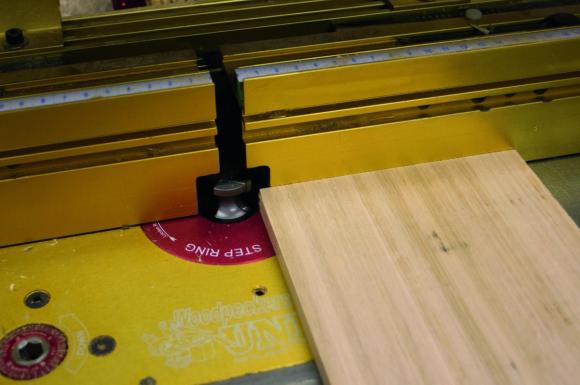
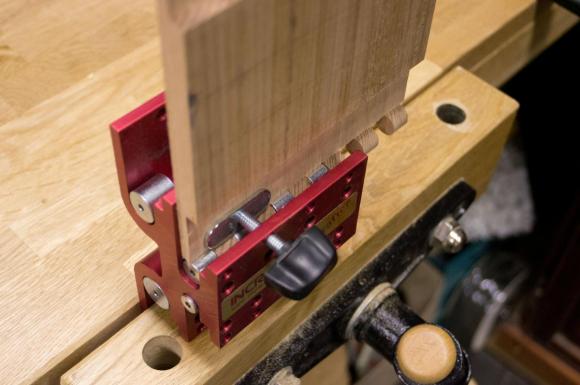
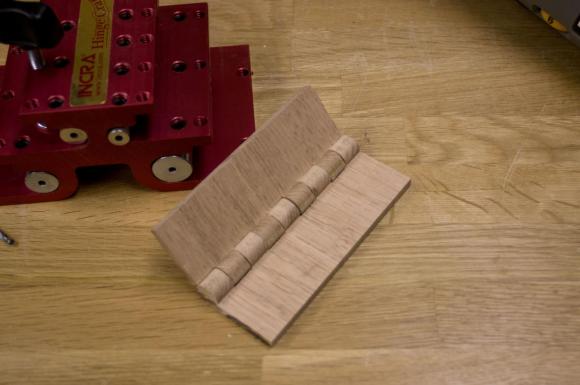
Drilling the hole for the hinge pin accurately is an important step, and this is where the Incra Hingecrafter comes into its own. With guide bushings between each knuckle, it ensures the drill bit is kept perfectly aligned, and helps prevent any breakout as the drill bit passes out the rear edge of each knuckle. This is exasperated by the grain direction that is chosen for overall hinge strength, but means the knuckles are vulnerable during drilling.
With such a deep hole, it is important to regularly back the drill bit out to let the shavings clear, otherwise the heat build-up can easily cause the knuckles to fracture during drilling.
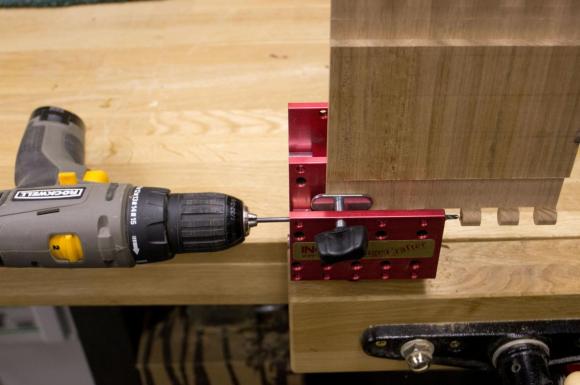
For wider hinges, you can reposition the hinge in the jig to continue the hole all the way through.
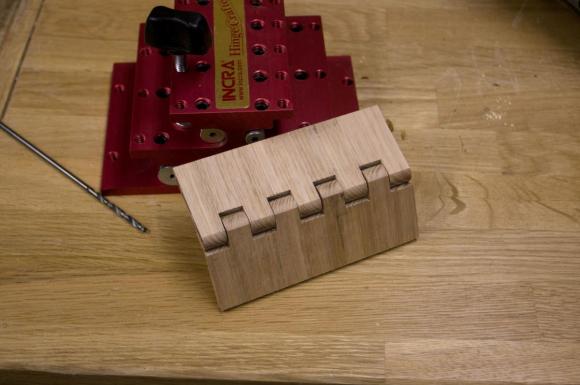
With the holes drilled, each side of the hinge is ripped off on the tablesaw, before the hinge pin is driven home. A brass rod used as a hinge pin completes the assembly, and the hinge is cut to the final desired length.
There are many applications for hand-made, wooden hinges, and it doesn’t have to be simply a door of a cabinet, or hinge of a box. Your imagination is the only real limit. Imagine, for example, a hinge that is in itself a box. Not a bad business card holder!
Tools used in this project:
- Incra Hingecrafter (Metric)
- Incra LS Positioner (Metric)
- Whiteside Router Bit Set
All available from Professional Woodworkers Supplies (www.woodworksupplies.com.au)


